
Using Blurb to Create an Awesome Anthology
Before I started homeschooling, I had a little photography business. I was always looking for the best photo book company to share with my clients. In the process I stumbled upon Blurb, a self publishing company that provides excellent quality books for a great price. I just checked, and I've created over 70 books with Blurb *blush* some of them I don't even recall making!
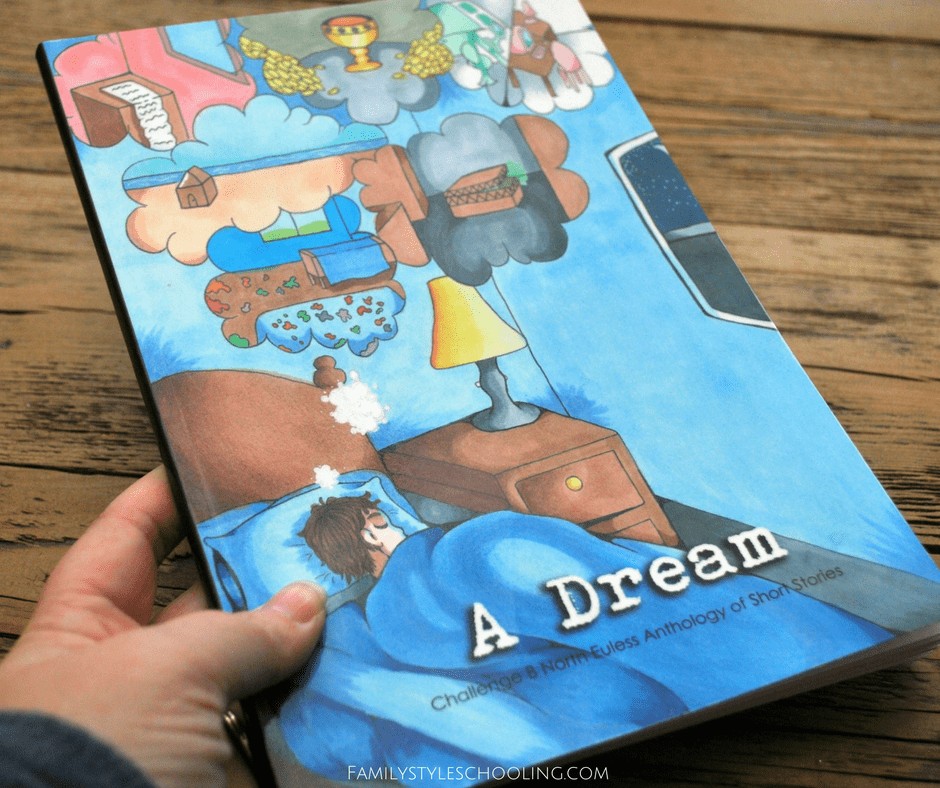
When it came time for me to make my Anthology for my Challenge B class, I knew that I wanted to use Blurb's trade paperback option for printing them up. It really makes the end product feel super official and celebrates their writing in a special way for a ridiculously low price. I've created a video walk through for anyone interested in reproducing this idea for their students.
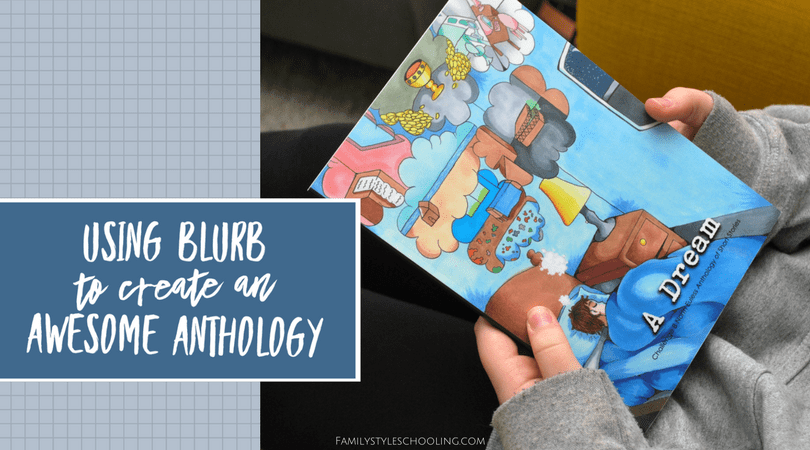
What is an Anthology?
An anthology is just a collection of writings by different authors, usually in the same literary form. In Challenge B of Classical Conversations, students spend their second semester crafting and fine tuning a short story of their own while they read famous short stories. It's such a fun element of their studies as they begin to express themselves.
Printing with Blurb
When I was an Essentials Tutor, I had created a couple of similar compilations, except I just went to the office supply store, made the copies and spiraled the paper. The difficulty with that method is that it still felt labor intensive, and it wasn't really all that inexpensive—especially if you were interested in including color in any of your printing.
Blurb offers many different book options, and I've tried just about all of them. I love their 12x12 books for celebrations of our travel photos, their 8x10 for family photo scrapbooks, and the 6x9 trade book for publishing writing.
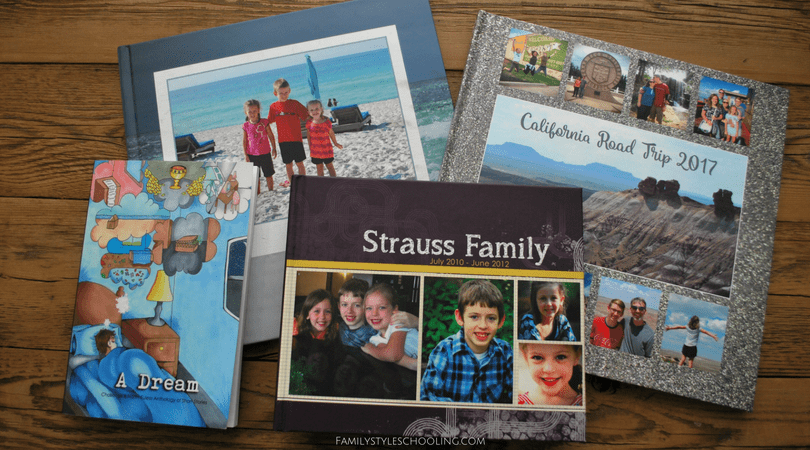
They are extremely cost effective which allows my family scrapbooks to beef up to 192 pages while still remaining under $80 to print. That still blows my mind!
They have a quick turnaround, especially if you're not ordering thousands of books like one might assume a self-published book might do. The quality is excellent. Although there is so much freedom in how you design your book, you don't have to be a graphic artist to make a beautiful book. You can use their self-publishing tool BookWright to create simple layouts that showcase your work.
How to Make an Anthology with Blurb:
I'm much better at visuals, so I created a walk through from start to finish of making my anthology. You can watch it below. If you'd rather just read about it, skip the video and read on!
Step 1: Download BookWright
 Scroll down to the "get started" button and give it a click. You can either design your book in some other program and upload your design as a PDF, or you can use their program Bookwright to design your anthology. Unless you have Adobe InDesign or Photoshop and are familiar with those programs, I recommend using their book building tool. It will produce an excellent end product. At this stage you can play around with the size, cover options, and printing options and see how the price will change before you even start creating it. Once you've settled on your options, you can download their program which gives you the tools to build your book offline and then upload it for printing when you've finished putting it all together.
Step 2: Select Your Size
There are a variety of sizes, papers, and covers to choose from. I picked the 6x9 softcover book with economy color printing. With 84 pages, my books were still $6.99 a piece. If I would have ordered more than ten, I could have gotten an even better price with 10% off. Always check Blurb.com before you order though, because they usually have some excellent sale going on that can lower your price as well.
Step 3: Create Your Layout
There are three main categories of tools in BookWright: layouts, photos, and text files. In the layouts, you'll see options for different preset layouts. I pretty much just stick with the same two or three layout options through the majority of the anthology. The photos section is where you'll upload any images you'd like to use in your anthology. Just click the little icon with the plus symbol to add photos to your anthology library. The last section is for text files. You're going to love how easy it is to add the entire story to your book and watch the program work it's magic.
Here's how I lay out my book:
- Page 1 - Title Page
- Page 2 - Copyright information
- Page 3 - Dedication page
- Page 4 - Blank
- Page 5 - Table of Contents
- Page 6 - Blank
- Page 7 - Illustration of first story
- Page 8 - Blank
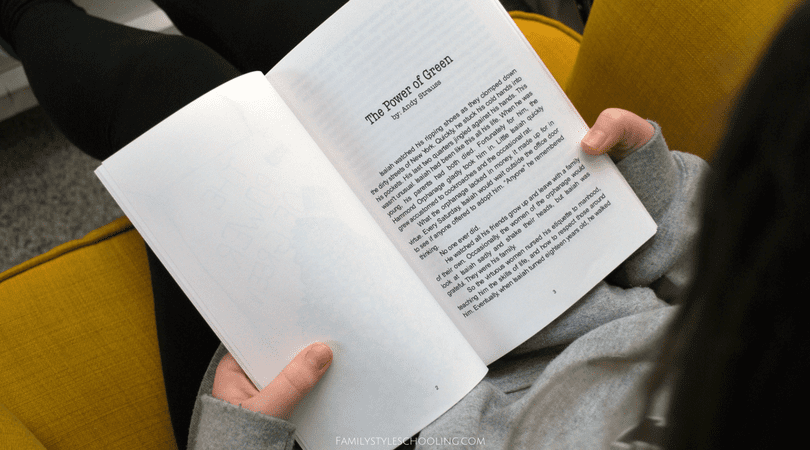
- Page 9 - First story
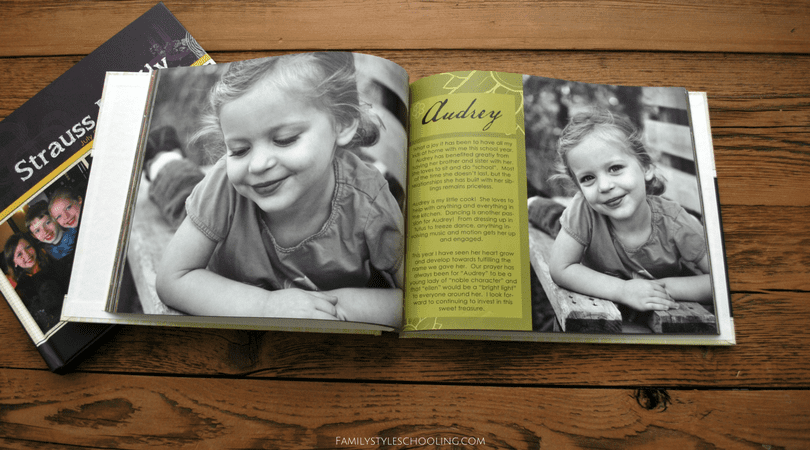
- Author's bio at the end of the first story
- Next blank right hand side illustration of second story
- Continue the same pattern until all of the stories are included
Step 4: Finishing Touches
When you've finished adding in all of your stories, you can go back and add page numbers to your book. I do this last, but it doesn't really matter if you start or end with it. Head up to the top left corner, and check out the three icons. These will be where you can find all you need to finish up your book. Start with the background tab. When you select it, you can easily add page numbers to your book wherever you'd like them to be. I like to put them in the center of the page at the bottom. You can also select where you want your book to start numbering pages. I don't like to number the "front matter" pages, so I'll skip the first six pages, and then start numbering. When you add it here, you'll only see the number symbol, but when you go back to your book, you'll see the page numbers have populated throughout your book.

Step 5: Create the Cover
The other symbol in the top left corner says "covers". This is where you can set a variety of options for covers. I have the design one of my students drew for our cover, then I just make the rest of the book a solid color. I put a class picture on the back, but other than that it's super simple. Even though I'm just ordering softcover books for my students, I can still create the designs for the other cover options, which will allow families to order those options if they really want to on their own. Again, I just keep it simple and repeat the same design. Since my book is pretty thin, I don't add anything to the spine. If your book is thicker, you might want to add the title there.
Step 6: Finish Up & Order
At this point you can convert your book to a PDF for proofing. It's just a way to look through your book like it will look when it's printed. Once you're happy with your proof, you can upload your design to be printed. Make sure you have the paper type selected before you go to upload. The price will change dramatically if you have the nicer paper selected. After you pick which options you want to make available for purchase, the uploader will walk you through a review process. This will allow you to check one last time for spelling errors or anything else that might come up that you might want to fix.
Fun Ideas For Making Books with Blurb
These little books are so much fun to make. They would be a great way to celebrate writers of all kinds. Here are some other fun ideas for book making:
- Poetry anthology for your young poet (or Challenge III student).
- Essentials graduation gift - an anthology of the best writings of your Essentials student over their three years.
- Family writing celebration - an anthology of your family's writings over the school year.
- Self publishing that story your young author has been writing over the past few years

The possibilities are endless! Check out Blurb today and get started creating your own books to fill your bookshelves.
Betsy Strauss is an unexpected homeschooler, mother of three, who is in a relationship with a sweet man for life. She loves reading books, drinking coffee, and learning anything with her kids.
This is just what I was looking for, Betsy! I’m hoping to do a memory book for our daughter who is graduating sixth grade in June. Thanks for reading my mind. I can’t wait to try out Blurb!
Wonderful! There are so many fun ways to use this to celebrate our kids. I also love scanning their artwork and creating art photo books…that way I don’t have to keep all of the “treasures” piling up in a box somewhere!
Thanks so much for this incredibly helpful video! I can’t wait until my Challenge B class has finished their stories.
You’re welcome! The kids are so excited to see their writing officially published!
Betsy, thanks for making this tutorial. How long is the turnaround time to have the books actually in hand? I have a family that is moving and I want to be sure to choose an option for printing that will get them their book in time.
I know I didn’t pick the fastest shipping time, but still received my books within a week. They always estimate longer than it took for them to arrive for me. It also depends on how long it takes for the actual shipping company to get something to you. I live right by DFW airport, so it’s a great place for fast shipping. Another option for you is to give the link to purchase a book to the family that is moving and they could have their book shipped to their new location. Sometimes it is just hard to get it all wrapped up and set off!
Betsy, this has been so helpful! One question: how did you get the dot leader to page number in your Table of Contents?
I just did it manually…….I added dots just until the numbers bumped to the next row. Not very high tech, but it gets the job done!
Does it matter what the kids send to you for the final proofed stories… like their margins or font?
Will anything pretty much work if I have parents email a good doc as an attachment if they have google docs?
and if someone doesn’t have google docs they can email me in a common font and margin size and I could cut and past in my own google drive. or will that not work?
and have kids draw illustrations and cover actual size or 8×10 and just scale it down?
It doesn’t really matter because you just copy and paste…the formatting will all be unified with Blurb. If someone doesn’t have google docs, they can really just send the story typed in some format so you can copy and paste – which really they could just send in the body of an email…anything so you don’t have to retype it! And YES, pictures will scale easily. Just remind them to orient their drawing portrait (like it will be in the book) not landscape, or their picture will not fill the page.
Thank You for quick answer time and blessing us!
THANK YOU!! for doing this for us ChB Tutors.. I am reaching through and want to give you a cyber hug! (I have 11 students and this is overwhelming when I’ve never done ChB before! BLESS YOU! Love Latin w Andy.. love your whole site! I highly recommend it to all I know!
You’re welcome!! Anthologies were one of my favorite things from Challenge B! Happy this helps 🙂
My ChB students have asked about approximate length for their short stories. What did you suggest for your class?
I just went with no more than 10 pages. They could be single or double spaced. For the most part, I generally only had one or two kids that just needed all of those words! Most of the short stories were shorter than that. Hope this helps!
I noticed in your layout you have a page set aside for copyright information. What copyright information? I want to make sure I give credit where credit is due but can’t think what copyright information I should include. Thank you SO much for the video. I wasn’t going to use Blurb simply because of the amount of time it would take me to figure it all out, and now, I know I can complete it in a timely manner.
It’s just basic information like a date and “all rights reserved.” I’m not really worried about someone stealing my students’ work, but it does make the publication feel more formal. Here’s more information about copyright law if you’re interested: https://www.termsfeed.com/blog/sample-copyright-notices/
Your video helped me tremendously. So, I created a short story anthology for our Challenge B class. Now how do I share the links so they can order their own? I don’t want to “sell” these or make a profit. I can’t figure out how to do that.
Thanks,
Carrie
Yay! So glad it helped! In the My Projects section you’ll see your book listed with the title to the right of the image. Right under that, there should be some sharing links like an envelope, twitter bird, and share, etc. If you click the “share” button, it will give you a link you can email out to your families that will allow them to order books on their own. It is just a private invitation that allows them to order, so you don’t have to set it up officially to sell. Hope this helps!
[…] I’ve made over 80 books with this company including family photo books, travel books, and writing anthologies. When I came home from our California road trip last summer, I was so excited to create a treasure […]
Betsy, thank you so much! Your site and Latin with Andy have been such a tremendous blessing. Does it matter what type of file the illustrations and photos are?
Typically I just asked for a jpg – if they illustrated their picture, they could just scan it or take a photo with their phone to send it digitally. Here are the official image guidelines for Blurb! Hope this helps!
Thank you so much! This saved my life when putting together our anthology, a task I had no IDEA and no ABILITY for! I ended up with a beautiful product. I would not have known to do most of the things you mentioned in your tutorial, so thank you.