
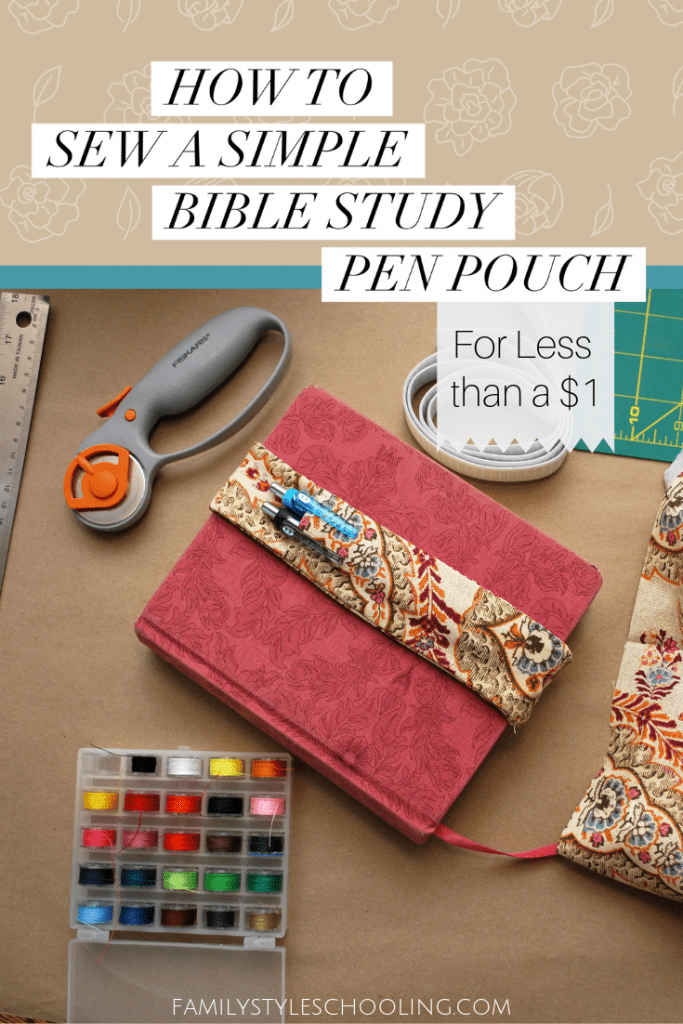
How to Sew a Simple Bible Study Pen Pouch
Having a pen handy when I'm at church or just reading my Bible is important because I always want to write down my notes when I'm reading. This simple Bible study pen pouch is quick to sew, super inexpensive, and keeps your pen handy to jot down your thoughts when you need to write them down.
My dad always valued writing in his Bible because he felt like it left a treasure map of his faith for his family. When he passed away, he left me a Bible with notes written directly to me. It is my greatest inheritance from him. I'm working on keeping that tradition for my own kids.
"Underlined" by Billy Gaines
The song that my dad referenced frequently went like this:
I found my mother's bible
it was just the other day
I watched the treasures of her heart
unfold with every page
well she's gone to be with Jesus now
of her thoughts I can't inquire
I could not have found more clearer written will of her desire
Underlined were the words about commitment
Underlined were the words about contentment
Underlined were precious promises that calmed her doubts and fears
Underlined the words that spawned the love
she'd shown throughout the years
I remember most the things she'd emphasized
I knew her heart by things she'd underlined....
Underlined by Billy Gaines
This is such a beautiful description of what my father did for me. I'm so thankful for him sharing his thoughts with me in this way.
Bible Study Pen Pouch Supplies
Here's what you need to make your own Bible study pen pouch:
- Fabric (I picked up a remnant for $1.18 that could make about 5 of these pouches)
- Elastic - width of your choice depending on the size of your Bible (I had some left over from a skirt project)
- Sewing machine
- Scissors or rotary cutter
- Thread
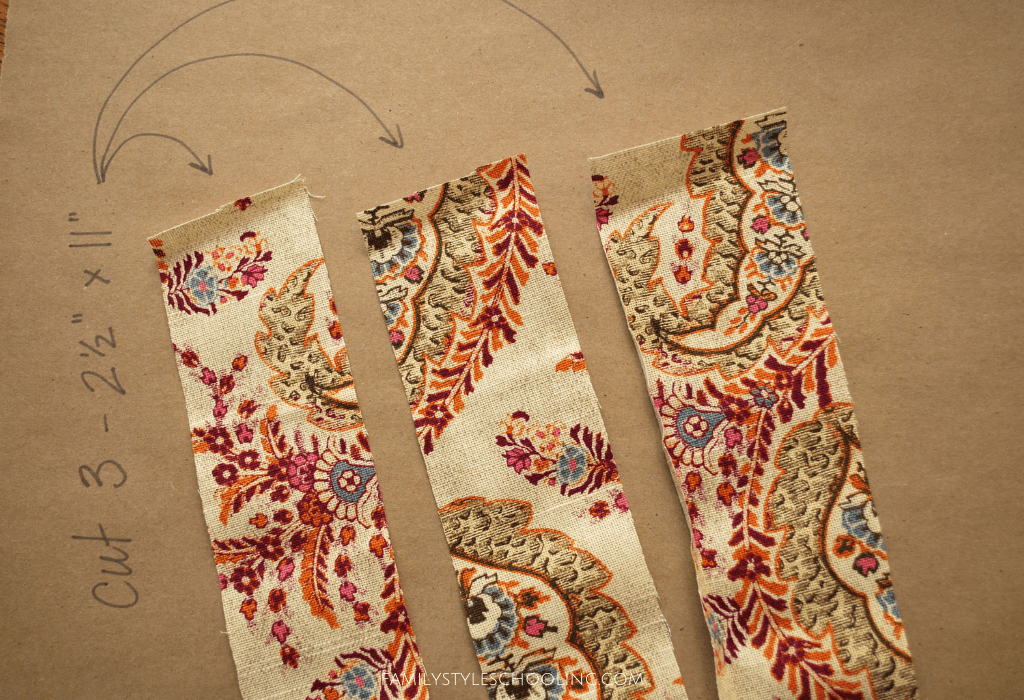
Step 1: Cut Out Your Pieces
I cut three 2 1/2" x 11" strips. One will be my pouch, and the other two will be the front and back of my pouch.
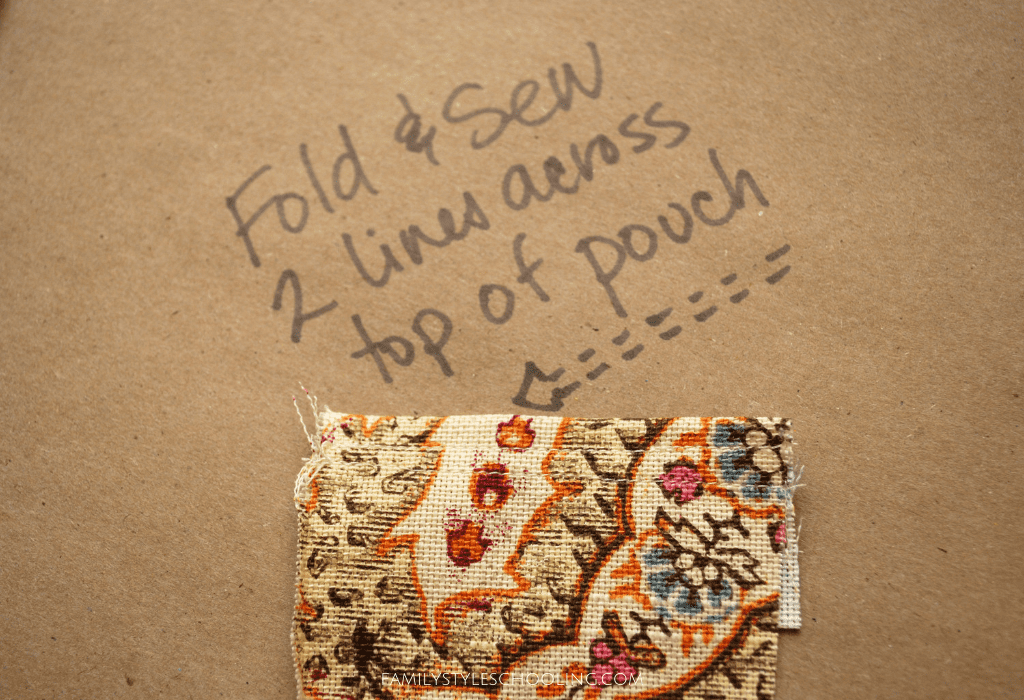
Step 2: Sew The Pouch
Take one of your strips and double fold one end down. Then sew two lines across the top. This will reenforce the part of your pouch that will receive the most action as you put pens in and take them out.
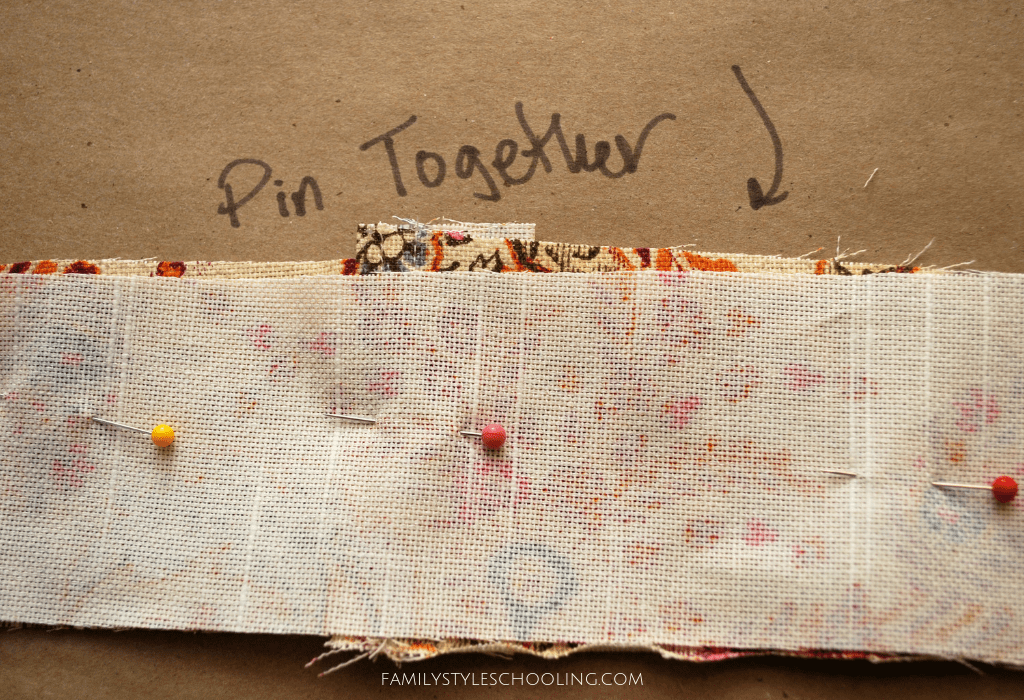
Step 3: Pin Your Pieces Together
Place your pouch piece where you'd like it to go and then put the back side on top of the other two with right sides facing together. Pin them together.
Step 4: Sew & Turn
Sew straight lines on either side of the pouch, leaving the top and bottom open. Then turn the pouch right side out. Be careful to not turn your pouch the wrong direction. If your pouch seems inside out when you turn it, then just turn the pouch as well.
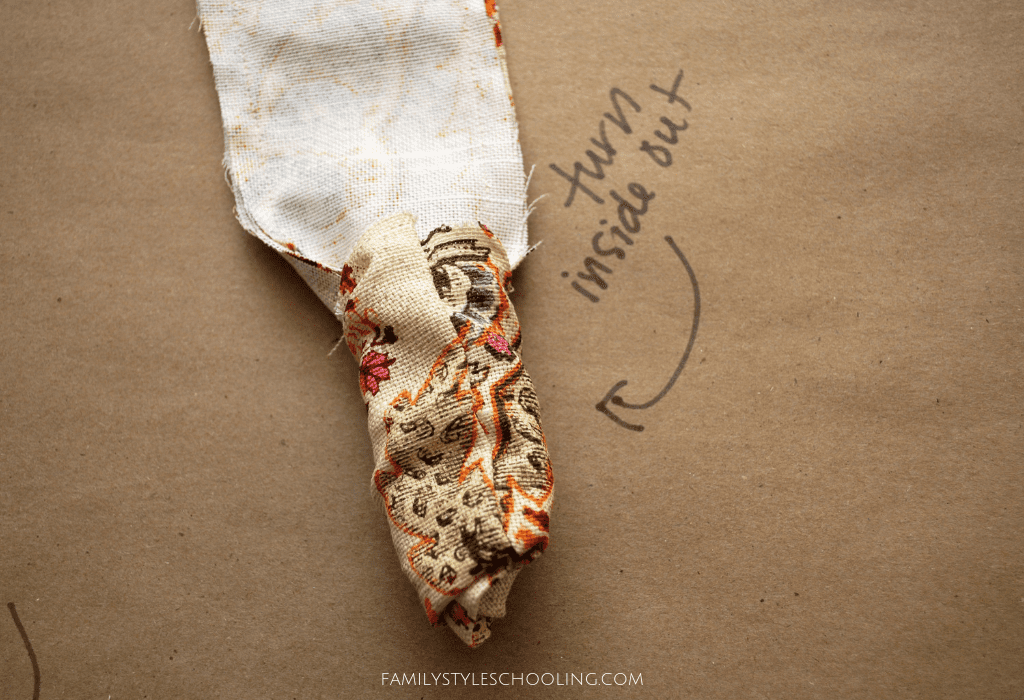
At this point, you'll want to iron your pouch so that it all lays flat nicely.
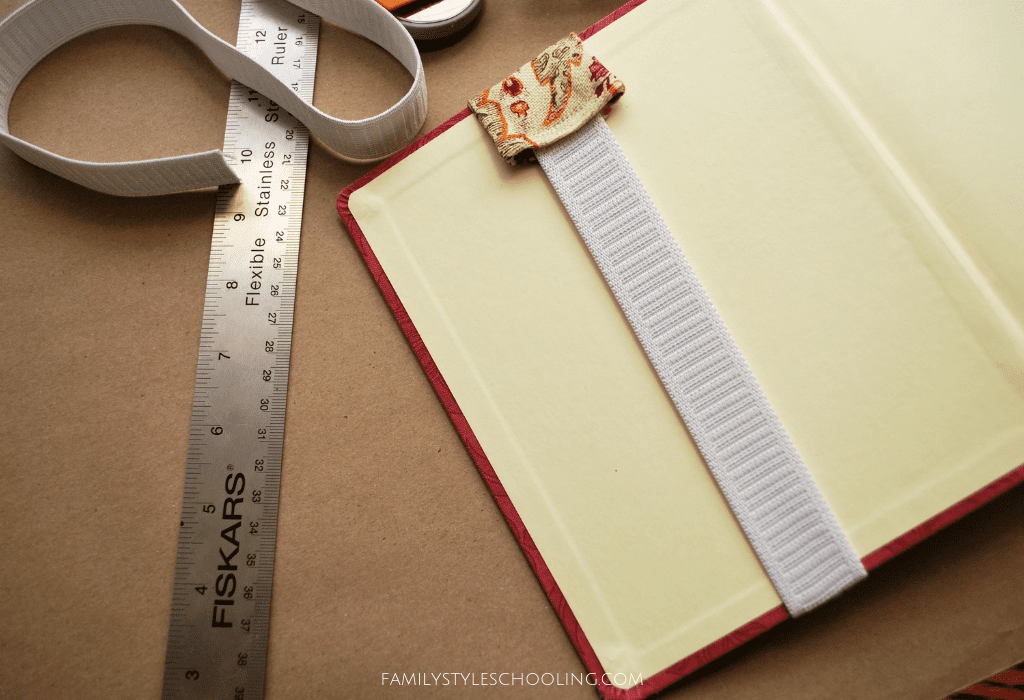
Step 5: Sew On the Elastic
Fold the unsown ends in and insert the elastic. Sew a straight line across to attach the elastic. I like to start with one end, then check the size and fit again before finishing sewing the other end. Once you're happy with your size, fold in the other end, insert the elastic and sew a straight line across.
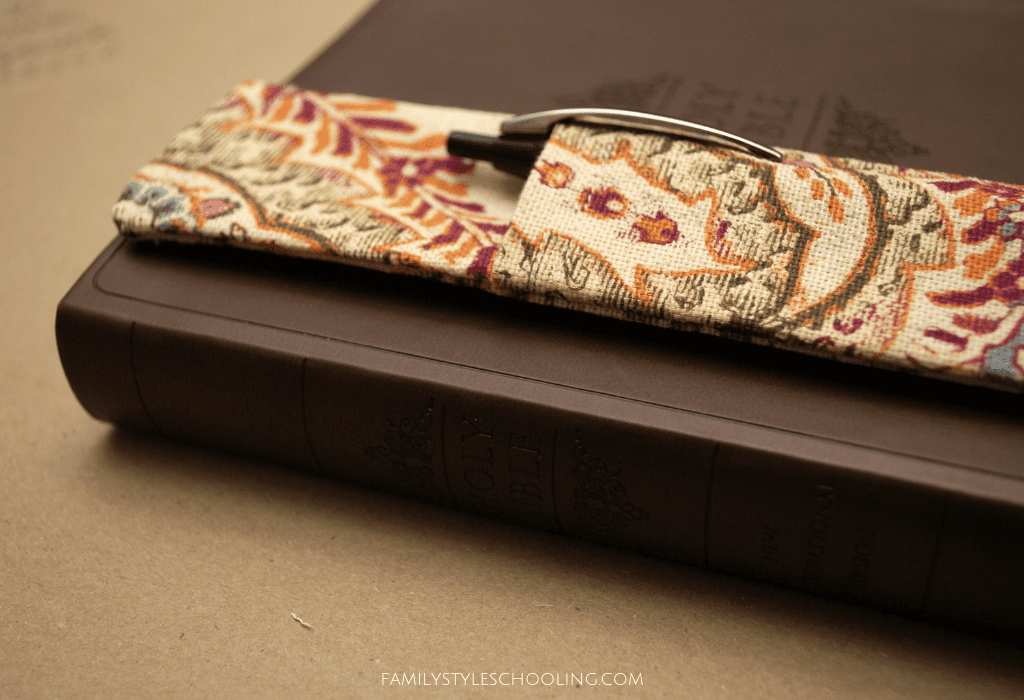
And you're done! Slide it on, insert your pens and enjoy!
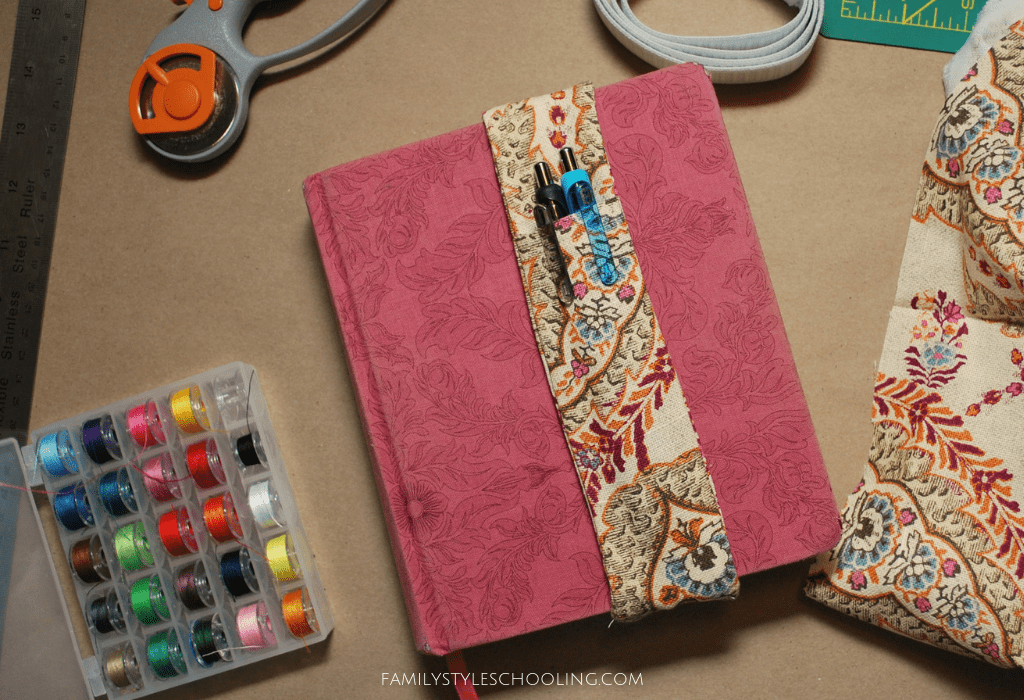
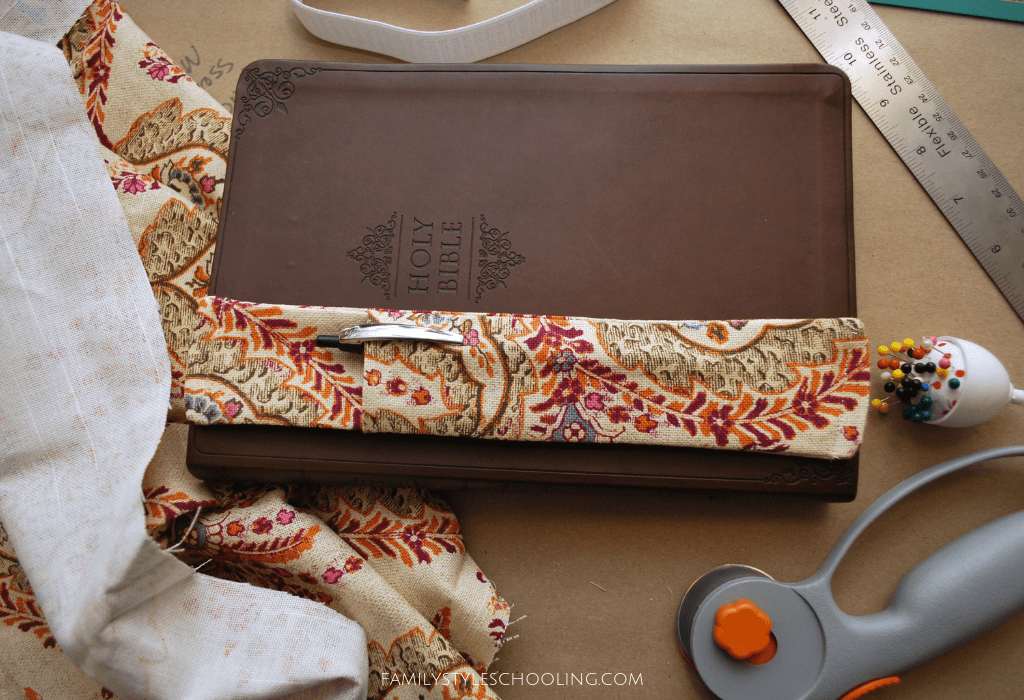
My Bible is a hard back journaling Bible, and it works great with the hard back. My mom loved my Bible study pen pouch and she wanted me to make one for her! It also worked well on her soft, leather bound Bible. We just slid it closer to the binding.

I have plenty more fabric to make a couple more! These would make great gifts with a cute journal as well, and they only take a few minutes to make.
Happy crafting!
Betsy Strauss is an unexpected homeschooler, mother of three, who is in a relationship with a sweet man for life. She loves reading books, drinking coffee, and learning anything with her kids.
Oh my goodness, I love that poem! We’ve got Bibles being made for all 3 of our kids being passed around to family members to write notes in.
I love this idea! It will make a great tutor gift. Thanks for sharing!!
Such simple directions… thank you for sharing!