
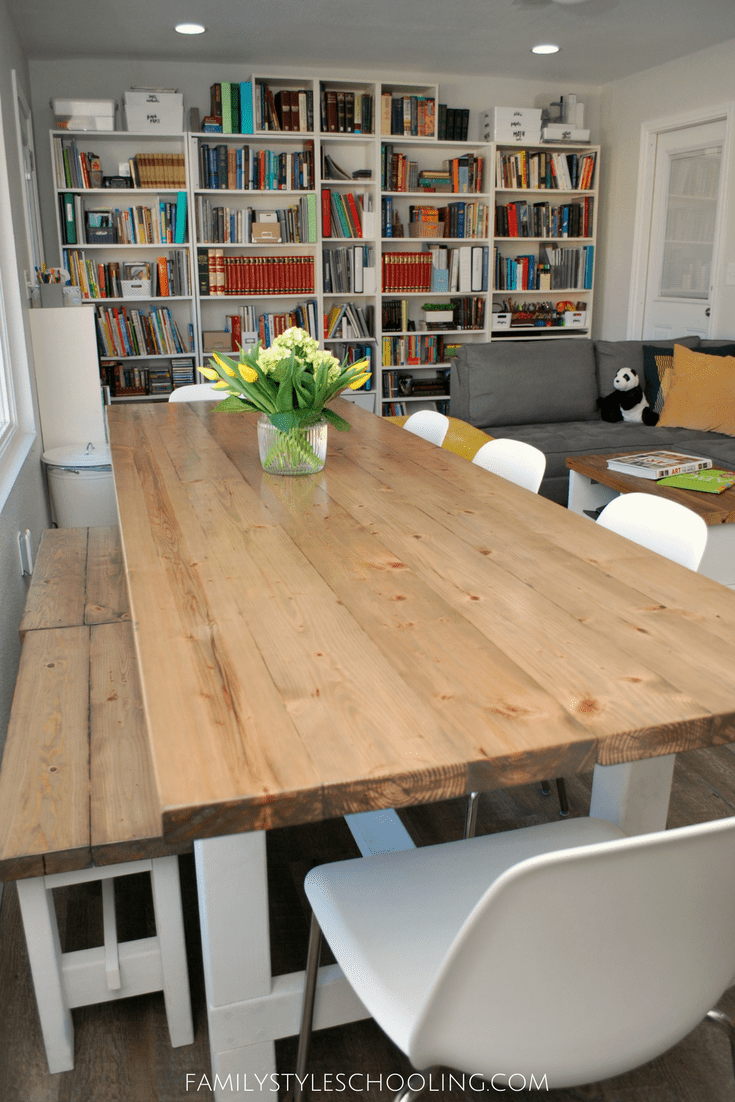
DIY Farmhouse Table for Under $100
When we set out to design our home library, I knew that I wanted some desk area for me or the kids to be able to study/work at. I went back and forth through pretty much every table option at IKEA before I realized that I just needed something custom designed to fill my desired purpose, and fit in the space.
I frequently have a number of additional kids at my house studying, so I wanted to make sure that I had enough surface area to accommodate the maximum amount of studiers. I have always loved the look of farmhouse tables, but they're not very practical when it comes to using one as a writing surface. My husband had a tough job making this table for me because I was so specific on what I wanted.
The good news is that the table turned out better than I imagined. It is the perfect table for our home library, but it also plays double duty as a entertaining space. I'm loving it.
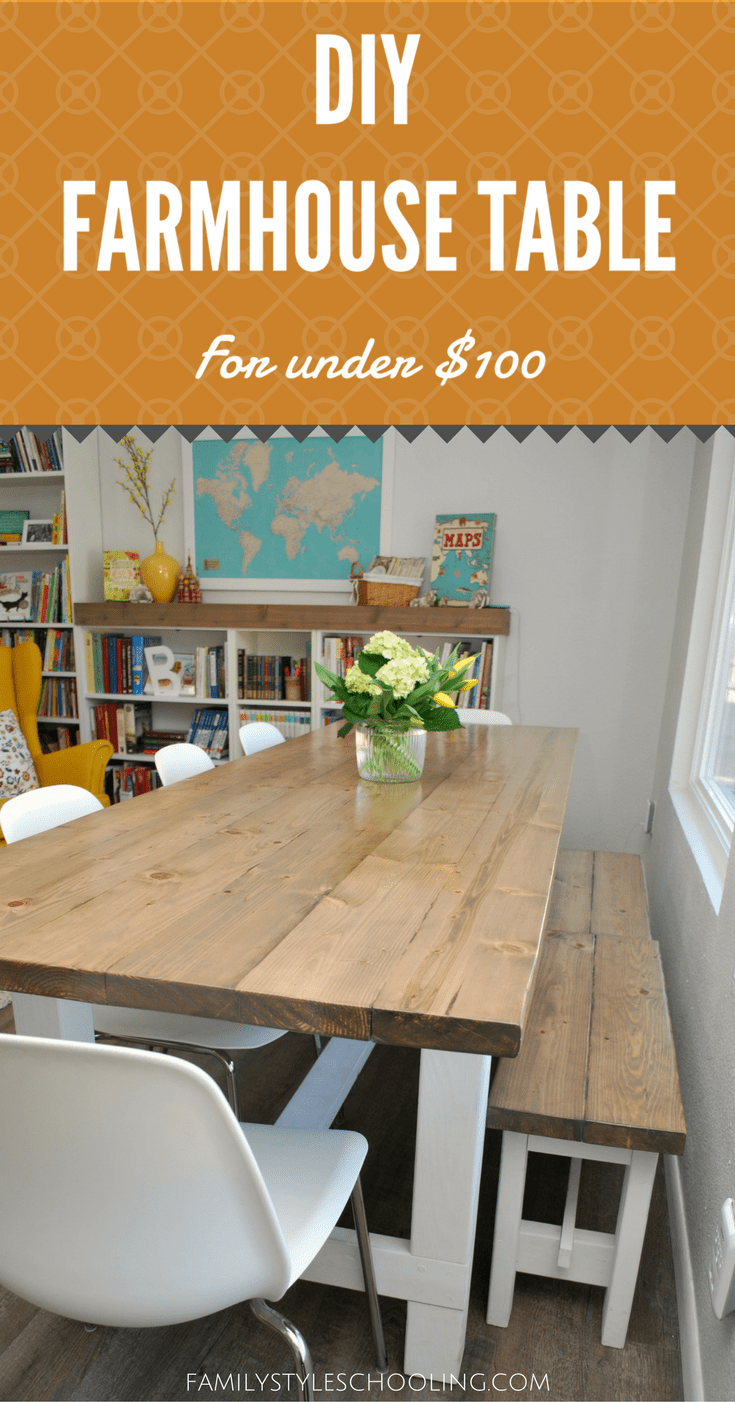
Our table was inspired by this farmhouse table design. We modified it a little bit, and my husband also built two benches to match.
The length of the table was easy, since we wanted an 8' long table. We simply used the lumber at the purchased length of 8'. We decided on using 2x6s but the nominal width of a 2x6 is not 6", it's 5-1/2". The desired width was around 30" wide, but we went with around 32". The table utilizes six 2x6 boards, so we needed to shave a little off.

Supplies Needed to Build Your Own Farmhouse Table
- 2ea 4x4 posts (8' long - I ended up using Douglas Fir)
- 4ea 2x4 (for stretchers)
- 2-1/2" pocket hole screws
- 3" screws
- High strength wood glue
- Semi-gloss Polycrylic (8fl oz)
- Button plugs for exposed screw holes (3/8")
- Minwax Stain (Weathered Oak and Jacobean)
Tools Needed for Construction
- Circular saw
- Power Screwdriver with drill bits (including a counter-sink bit if desired)
- Band Saw (or jigsaw)
- Kreg Jig (R3)
- Kreg Ripcut Saw Guide (KMA2675)
- Measuring tape
- Belt Sander
- Mouse Detail Sander
- Foam brushes
Not all lumber is equal. It will be very important to choose carefully. Inspect each piece with care, looking for wood that is as straight as possible, avoiding warps, twists, cupping, voids, cracks, or anything else. Not sure what I mean? This guy lays it all out for you.
Back at home, when all had been chosen, all the 2x6 pieces were laid out side-by-side on a flat surface to double check how they fit together. We had decided to start on the top since this was the most complicated part. Even with careful searching at the store, you aren't guaranteed perfect boards, but there's a solution.
Once the orientation of the boards was chosen and the best was placed facing up, simply mark the boards for this orientation, noting the top and even numbering them so you can put them back into their best place. Part of the solution for imperfect boards was cutting a very thin slice off of all the middle boards and the inside of the outside boards. The Ripcut saw guide by Kreg came in very handy for this, but a table saw (and a partner) can be used. Boards have a natural curve on every edge and this step made the edges square again. It also shrunk the width of the table overall by an inch or so.
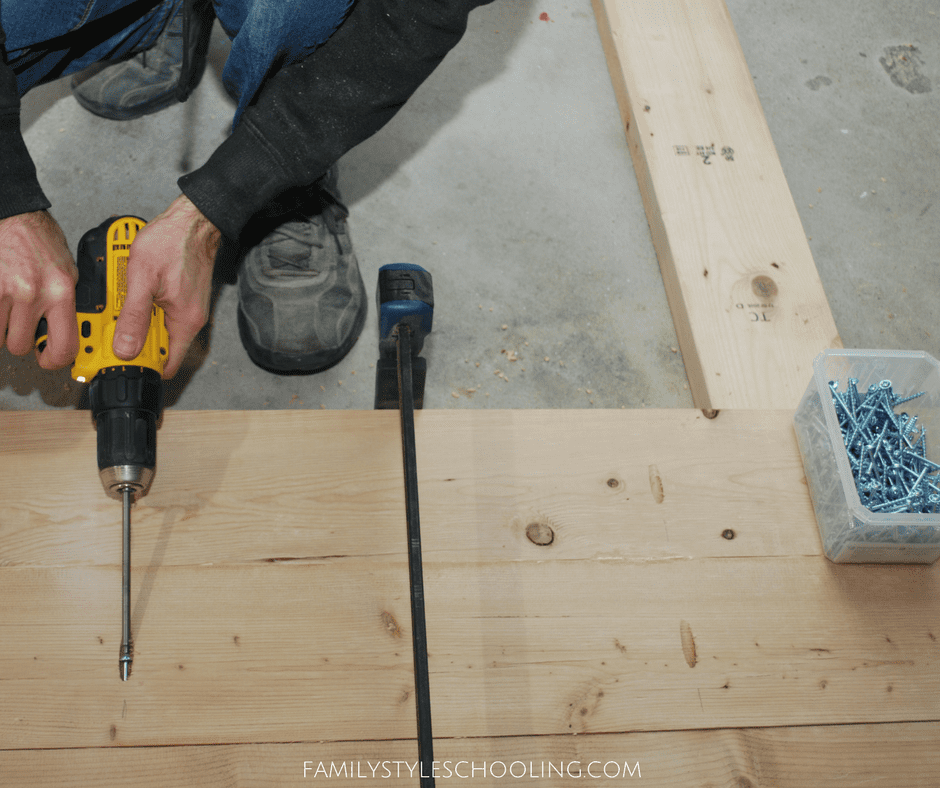
Once the edges were squared up, each board was placed upside down and the Kreg Jig was used to drill pocket holes about 16" apart. Be mindful of which board you are drilling - the holes should be drilled towards the center of the table.
Now the fun part. Once all the holes are drilled, line them all up face down on some scrap wood to raise it off the ground and put glue on the long edges. Four long clamps were used to clamp it together. Ensure that all the ends line up and that the boards are level - especially in the middle. If as you are clamping you find that one is sticking up higher, clamp it part way and press down on the one that's higher. Then clamp tight.
Once it's clamped use the 2-1/2" screws to screw it together:
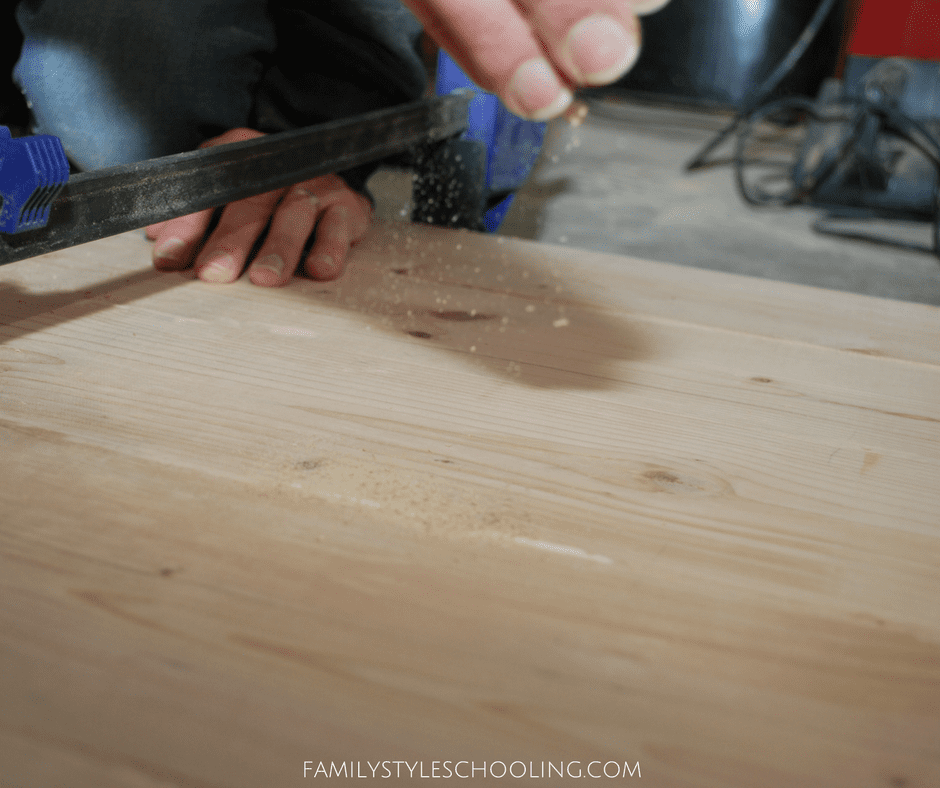
Let it set for a day and look carefully to see if you still have some very small openings. In each gap, put a little wood glue and take some of the sawdust from the cutting you have done and sprinkle it on. Rub it in and let it dry!
After all is dry, remove the clamps and turn your table top over (you'll need some help with this). You will likely still find some places where the wood is not entirely even. Take the belt sander with 40 grit paper and sand until all is even. Once it's all even, sand it again with 80 grit, then again with 120 grit. Sand the four edges and corners of the top to ensure they aren't sharp. Flip it back over and give it a once-over with the 80 grit on the bottom. Once you're satisfied, flip it one more time to the top and sand it with a 220 grit to get it nice and smooth.
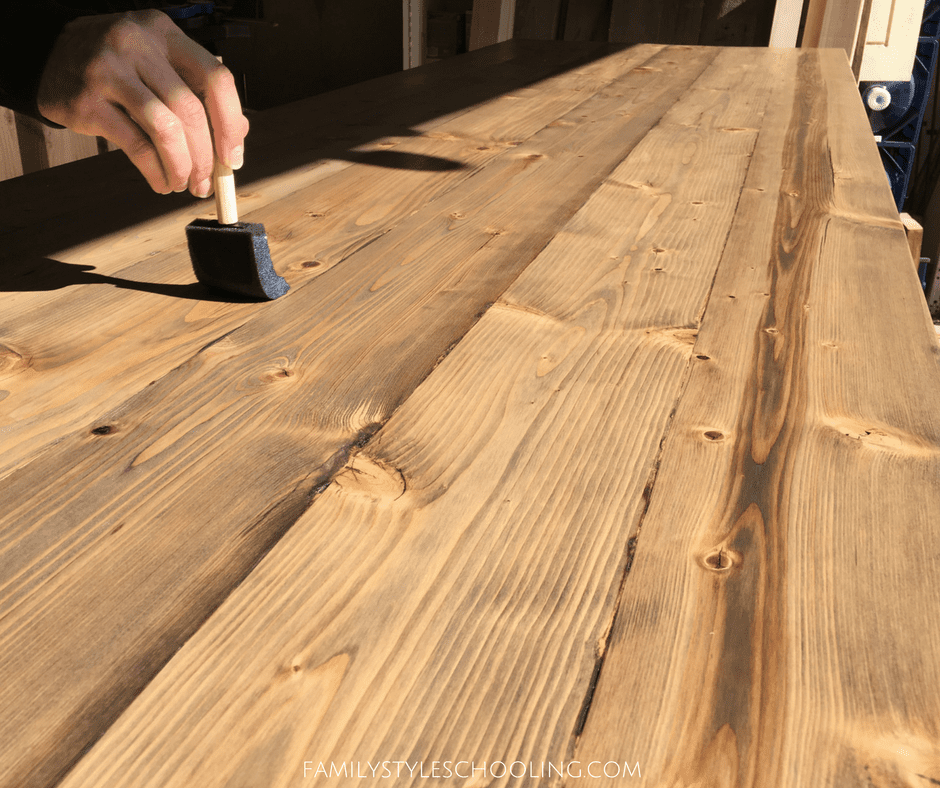
We mixed an 8:1 ratio of Minwax Weathered Oak (8 parts) with Jacobean. Using foam brushes, coat one board at a time, then let it sit for a couple minutes. Wipe off the excess and repeat. We also did one coat on the bottom.
After it's dry, coat the top several times with polycrylic, being sure to not over brush. Coat liberally and use 220 grit sand paper between coats.
The entire base was cut out while the glue was drying for the top. Here are the rough dimensions we used:
- 2x4 stretchers: 65" and 21"
- legs: 29"
- lower stretchers (for each end): 28"
- center support (long): 6'-0"
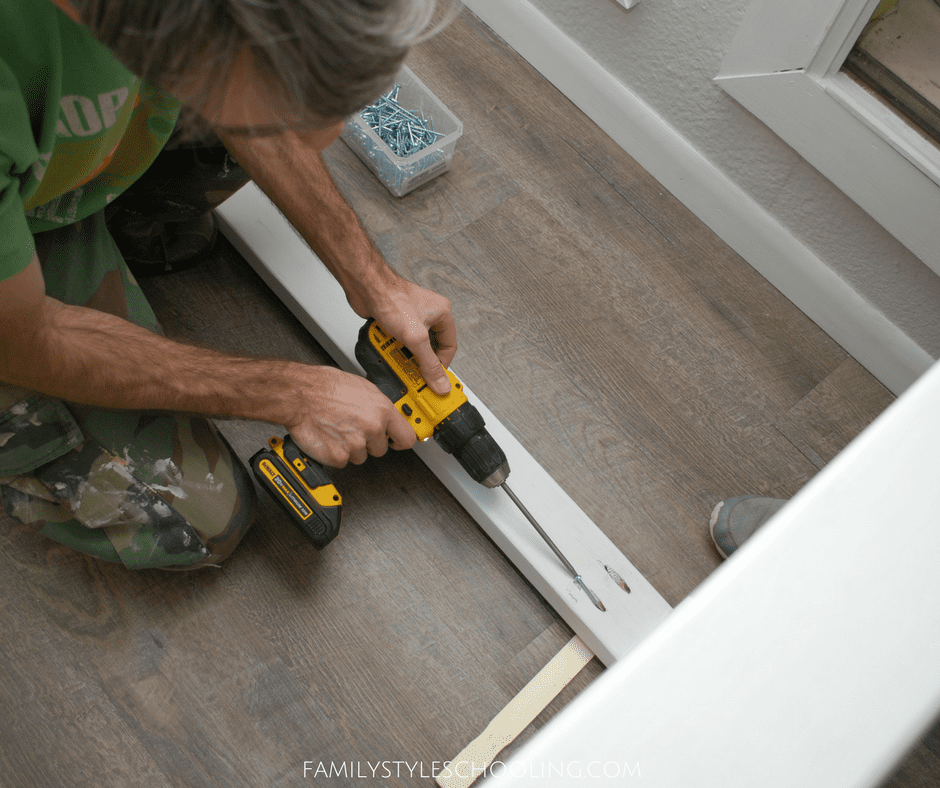
Drill 2 pocket holes at each end of the stretchers. Be sure to drill the pocket holes that will attach to the top of the table (about 16" apart). Pre-drill (and countersink) four holes at the ends of each lower stretcher and two at the ends of the long center support. These will be filled with the button plugs later (20 holes total). Double check that the plugs you purchase are the right size for the holes you are drilling.
Take the 4x4 legs and measure to the bottom of the lower stretcher about 6". Use a band saw or table saw to notch out a space for the lower stretcher. Then take the lower stretchers and notch out a space for the long center support.
Pre-paint everything a flat white:

Use a rubber mallet (if needed) to insert the lower stretchers.
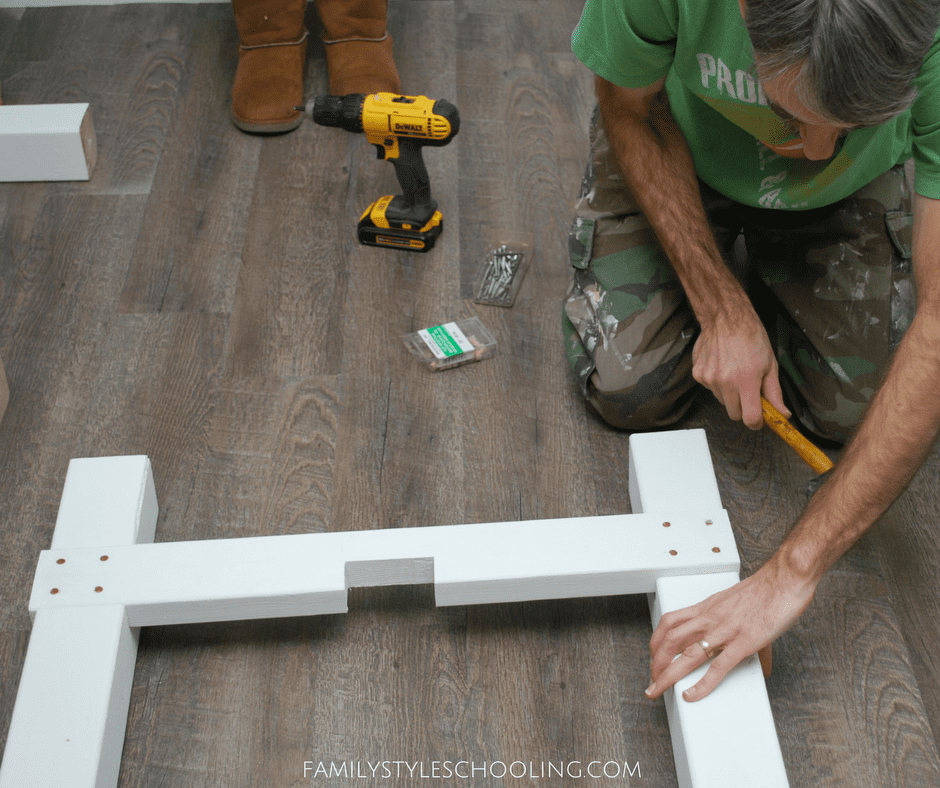
For the upper stretchers, place a paint stir stick or some other thin piece of wood underneath to offset it from the leg:
Once all the stretchers have been screwed to the legs, put the table face down and center the bottom before screwing it into place.
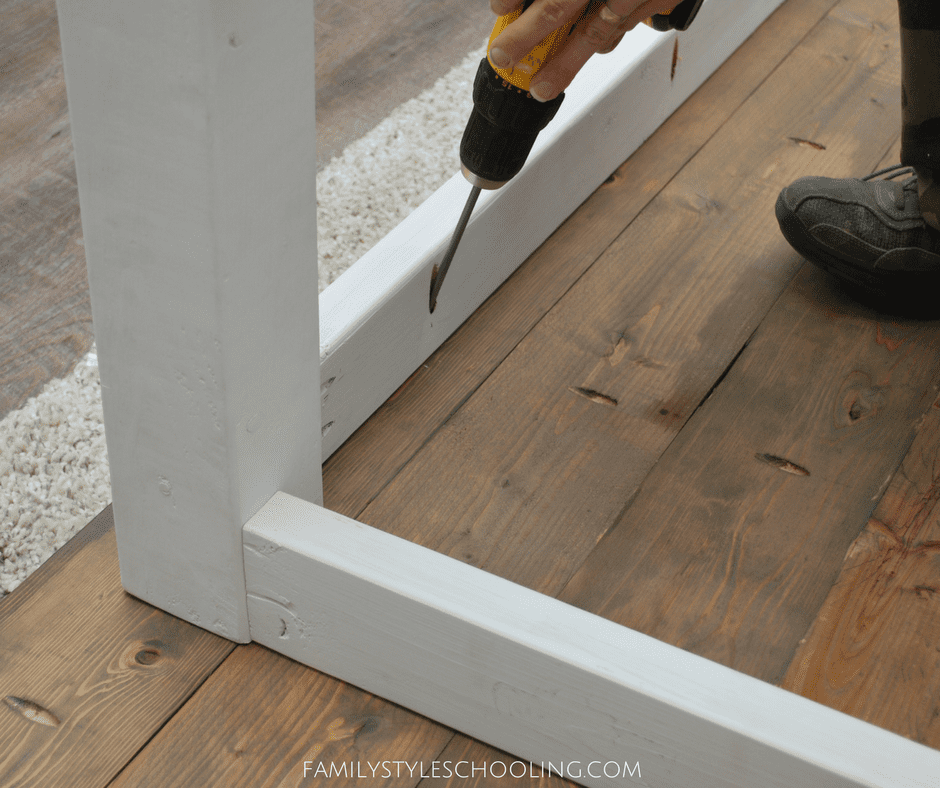
Turn it right side up and insert the long center support. You may need to push the legs outward to ensure that the end of the center support is flush with the outside of the lower stretcher. Like the lower stretchers, use 3" screws and hammer in the button plugs. Once they are all in nice and tight, paint over the plugs with white.
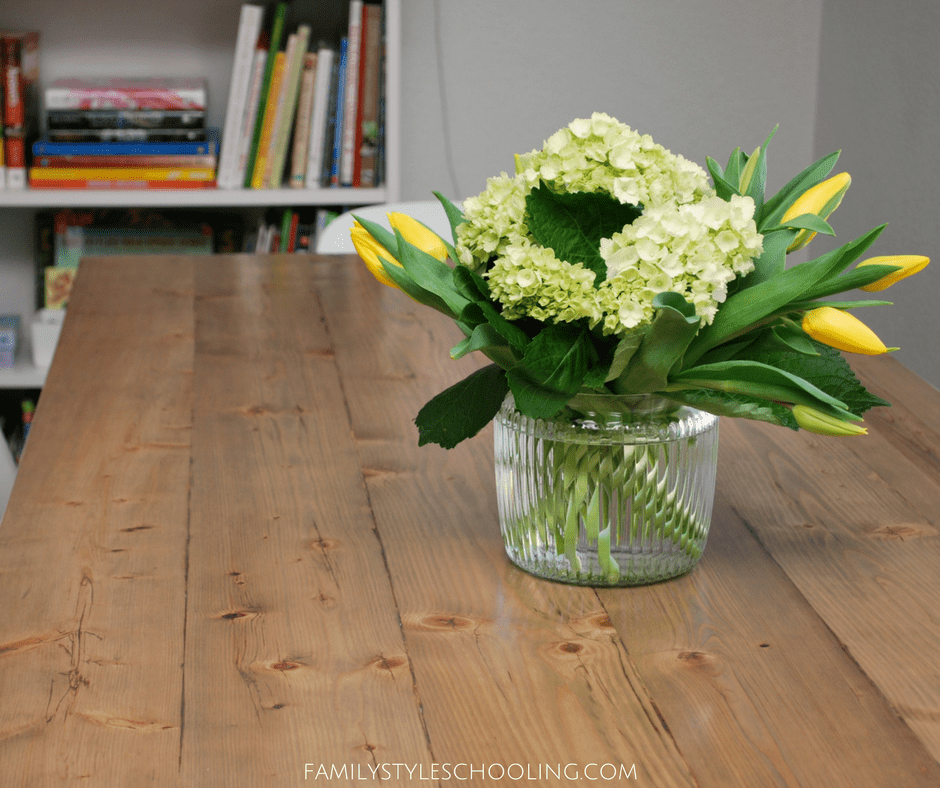
I love how many people can enjoy this table at once. It really turned out be be an excellent project, and since we did the work on our own, the cost was substantially lower than purchasing a table like this anywhere around.
Looking for some more simple woodworking projects? Here are some great ideas for beginners!
Betsy Strauss is an unexpected homeschooler, mother of three, who is in a relationship with a sweet man for life. She loves reading books, drinking coffee, and learning anything with her kids.
[…] love the wood top and white legs of this table from Family Style Schooling. It also shows you how well farmhouse and contemporary styles blend […]